A Beginner's Guide to HTML and CSS
Index
Part 1: HTML
To Part 2: CSS
About
Hello. My name is Pauli Kohberger, and I'm a writer, artist and graphic designer. After jumping ship from one social media site to another, I decided recently to make and maintain various webpages on Neocities.org to have a more permanent place to host personal work.
I know a lot of other people in the same boat as I am. I'm writing this not a half hour after the news that Vine is going to be shuttered, leaving its userbase in the lurch. This is the state of the internet nowadays: finding someplace that feels like home, and then suddenly finding yourself without it. Having to move from place to place is frustrating and exhausting, to say the least. So, I'd like to teach people a little bit about how to start and maintain a webpage or website.
(For the record, a web site can be made up of many web pages, but doesn't necessarily need to be. This site itself is just one page, after all!)
Tools
The good news is that you don't need much to write HTML or CSS! All it is is text on a page, so a program as simple as Notepad will do the trick. Personally, I use brackets.io, which is a lightweight, easy-to-use editor geared towards web developers, and is free and open source on Windows, Mac and Linux. There are other tools, of course, but that's the one I'm most familiar with.
For now, let's assume you're using Notepad. Even if you aren't, these instructions should be easy to follow no matter what tools you're using.
Getting Started
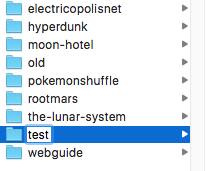
First, make a new folder on your computer, and title it whatever you want. For instance, I've named this one test.
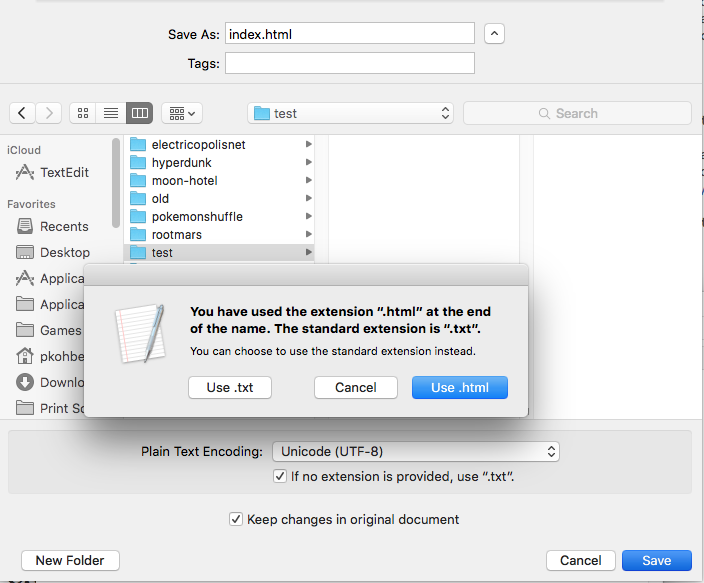
Now, open up your text editor to a blank page. Save it as index.html. (If a window like the one below appears, just hit "Use .html.") This is going to be our main page for our website--the first one that a viewer will see.
Next, type in the following text, or copy and paste it if you want (don't worry about the indents, those are just to make the code easier to read):
When you open this file up in a web browser, like Chrome or Firefox, you should see this:
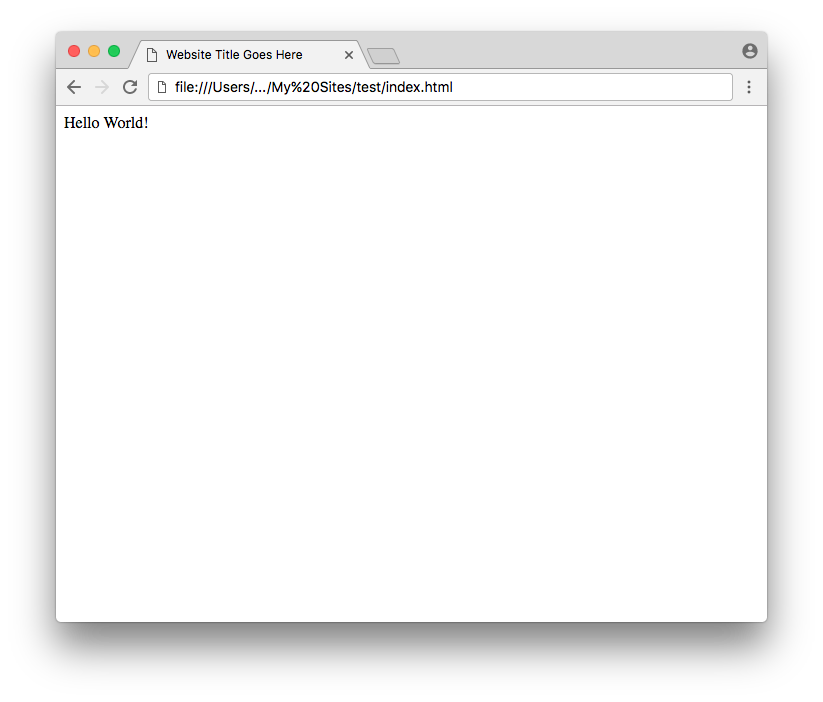
What you have now is the HTML code for your very basic webpage. It might look a little complicated, but for now, we'll just focus on what's within the <body></body> tags.
Basic Formatting
Save. If your file is still open in your browser, refresh it and you should see this:
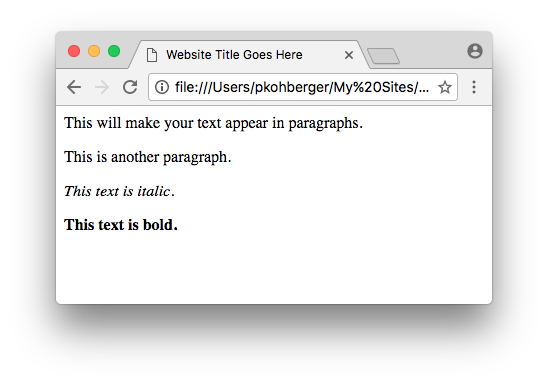
So, that's a really good start on building your webpage! By surrounding your text with the <p> and </p> tags, you can separate it into paragraphs. Now, let's try something with a little more structure...
Headers and Lists
There we go! Now you have headers, which are used to divide your text into different sections, and a bulleted list as well.
(Side note: the "ul" in <ul> </ul> stands for "unordered list," and the "li" in <li> <li> stands for "list item." If you replace <ul> </ul> with <ol> </ol>, or "ordered list," you can have numbers instead of bullets.)
So, that covers some basic ways of organizing text. But what about other basic building blocks, like images and outgoing links?
Links and Images
Somewhere on your index.html file, tack this code at the end:
Save, and refresh the file in your browser. Click the link, and voila, a Google page. To link to another URL, just replace the "http://google.com" with "http://whateverurl.com". If what you're linking to is on your own webspace, such as an additional page of your site, you don't even need to type all that: you can just write "/page2.html" or whatever the title of your file is. But remember to keep the quotation marks!
Inserting images into your HTML file uses very similar code. For instance, I've put an image called "slime.png" inside my "images" folder, which is inside my main website folder. If I want to put that image on this site, I'd type:
And that makes this appear!
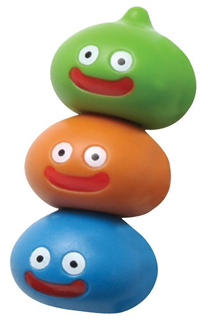
So, inserting images is a lot like making a link. Instead of putting the URL of a website inside those quotes, you type in the path to your image. (You can link to images from other websites, but that's called hotlinking, and it's not a good thing to do.)
Boxes in Boxes
Now, you might be noticing that all of these elements we've written are stacked inside of each other. The <li> </li> items are stacked inside the <ul> </ul> tag, which is stacked inside of a <p> </p> paragraph. Even the <body> </body> tag, which contains all of this text we've written, is nestled inside of the overarching <html> </html> block.
That might sound confusing, written out like that. But if you simplify the code we're working with...
Then it becomes more obvious. Writing HTML is really just a matter of putting content, like text or images, into boxes, and then putting those boxes inside of other boxes.
But how do we make those boxes actually interesting? How do we define the way they look and act? Well, the easiest thing for that is to use something called CSS. For the tutorial on CSS, just click below.
To Part 2: CSS
Credits
This page is maintained by Pauli Kohberger. If you have any feedback or suggestions, please email me at pkohberger at gmail dot com.
The background image is "segaiha" from Subtle Patterns.